
I bet almost everyone here at the forum has heard about the Arduino and how much fun and how useful it can be to model railroaders and to other hobbyists.
The price is no issue at about 3,- £$€. But not every hobbyist has affinity with electronics or with software. To some the initial hurdle can be just too steep, even while there may be an interest to get started with Arduno and to try things out.
That is where the plan arose to do a series of articles and videos titled 'Fun with Arduino', aimed at anyone who is not an electronics or IT specialist (yet  ).
).
The first two articles, both with video, are out:
Fun with Arduino 01 Getting Started in 6 Easy Steps.
Fun with Arduino 02 Digital Input and -Output
(Language is English)
[img width=800 height=450]https://up.picr.de/34711429bx.jpg[/img]
 Stummis Modellbahnforum
www.stummiforum.de
RE: Fun with Arduino - a Series of Introductory Videos
![]() #1 von
RudyB
, 01.01.2019 18:59
#1 von
RudyB
, 01.01.2019 18:59
Youtube channel on Model Railway, Traincontroller, Arduino and more

RE: Fun with Arduino - a Series of Introductory Videos
![]() #2 von
Running.Wolf
, 02.01.2019 17:43
#2 von
Running.Wolf
, 02.01.2019 17:43
Nice idea
Go ahead.
Gruss Wolfgang
All that the young can do for the old is to shock them and keep them up to date. George Bernhard Shaw
- Running.Wolf
- EuroCity (EC)
-
Beiträge: 1.371 Registriert am: 15.01.2006 Homepage: Link Ort: Isernhagen Gleise C-Gleis / M-Gleis Spurweite H0 Steuerung CS 2 Stromart Digital
RE: Fun with Arduino - a Series of Introductory Videos
![]() #3 von
RudyB
, 06.01.2019 11:50
#3 von
RudyB
, 06.01.2019 11:50
The third video is online.
To control the on board LED is fun, but the real fun only starts when we can control external LEDs, like on a switch panel, or on a model railway layout. This video is about how to connect a LED and how to choose the value of the series resister we need to set the LED brightness.
In the next video we are going to control the external LED and we will simulate a night cycle on a model layout.
Link to Fun with Arduino 03 External LED and Resistor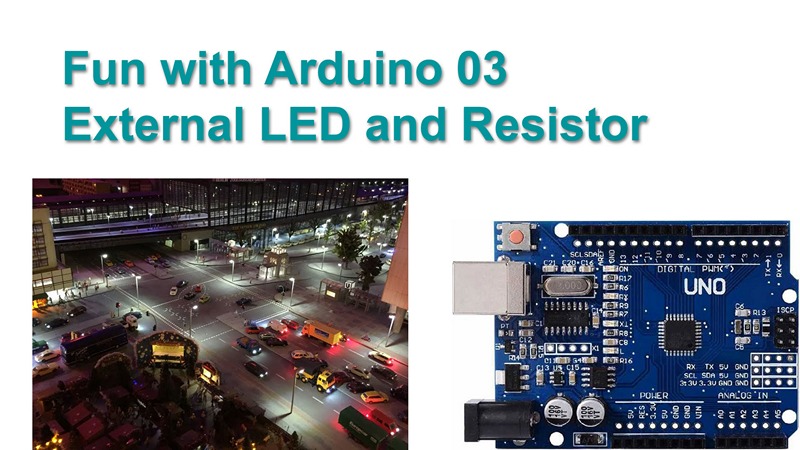
Youtube channel on Model Railway, Traincontroller, Arduino and more
RE: Fun with Arduino - a Series of Introductory Videos
![]() #4 von
RudyB
, 11.01.2019 14:35
#4 von
RudyB
, 11.01.2019 14:35
The goals in this video are:
- To make our code better readable and easier to maintain.
- We imagine pin 8 operates 20 street lights on a model railway layout. They switch on when we press the button. To simulate a night cycle we want them to stay on for 3 minutes and then automatically switch off again.
Link to Fun with Arduino 04 Readable & Maintainable Code , #define, delay()

Youtube channel on Model Railway, Traincontroller, Arduino and more
RE: Fun with Arduino - a Series of Introductory Videos
![]() #5 von
fbstr
, 11.01.2019 14:43
#5 von
fbstr
, 11.01.2019 14:43
Hi Rudy,
I'm thrilled to see the chapter: "Arduino and DCC"
That's the next step for me. Unfortunately not much time for Arduino at the moment but I'm hoping to continue with this topic in spring 2019.
Gruss
Frank
---------------------------------------------------------------------------------------------------------------------
MobaLedLib Wiki
Projekt "Bahnpark Augsburg"
Stummitreff BB: jeden 3. Freitag im Monat im Haus Sommerhof in Sindelfingen
- fbstr
- Metropolitan (MET)
-
Beiträge: 2.510 Registriert am: 28.08.2016 Ort: Stuttgart Gleise Peco Code 75, Trix C Spurweite H0, H0e Steuerung YD7001, MobaLedLib, MirZ21, Lenz LZV100 Stromart DC, Digital

RE: Fun with Arduino - a Series of Introductory Videos
![]() #6 von
RudyB
, 11.01.2019 15:33
#6 von
RudyB
, 11.01.2019 15:33
Hello Frank,
DCC applications fall somewhat outside the scope of 'beginning with Arduino'. I have done a series of articles, sofware included, on an Arduino based DCC servo decoder, accessory decoder, DCC sniffer and an S88 encoder on my Rudysmodelrailway blog.
Here's a link: https://rudysmodelrailway.wordpress.com/...c+servo+decoder
Youtube channel on Model Railway, Traincontroller, Arduino and more
RE: Fun with Arduino - a Series of Introductory Videos
![]() #7 von
RudyB
, 13.01.2019 13:38
#7 von
RudyB
, 13.01.2019 13:38
Arduino outputs can only switch 20mA. If we want to control groups of multuple lights on our model railway layout, we will need some more 'oompf'. A 12V power supply will do great and we can use Relay or FET modules, controlled by the Arduino, to swicth the higher current / voltage. How to do this, how to wire this, is the subject of this video and article.
Link to Fun with Arduino 05 Connect multiple LEDs with a Relay or a FET![]()
Youtube channel on Model Railway, Traincontroller, Arduino and more
RE: Fun with Arduino - a Series of Introductory Videos
![]() #8 von
RudyB
, 17.01.2019 13:42
#8 von
RudyB
, 17.01.2019 13:42
In this 6th video we are going to create a fully automatic day / night sequence, witch a toggle switch and an indicator LED on our switch panel. The day & night times are going to be configurable in seconds, which means we need some math to go to milliseconds.
Link to Fun with Arduino 06 Automatic Day & Night Cycle with on/off Switch
Youtube channel on Model Railway, Traincontroller, Arduino and more
RE: Fun with Arduino - a Series of Introductory Videos
![]() #9 von
RudyB
, 20.01.2019 12:19
#9 von
RudyB
, 20.01.2019 12:19
Our day / night module of the previous video works perfect, but it controls just one light group. On our layout we probably have multiple groups ... houses, street lights, a railway station or an industry area. In this video we're going to see how we can control multiple light groups in a day / night cycle, while of course they do not switch all at the same time and also while making it non predictable.
Link to Fun with Arduino 07 Day & Night Cycle, Multiple Light Groups, Random Times
Youtube channel on Model Railway, Traincontroller, Arduino and more
RE: Fun with Arduino - a Series of Introductory Videos
![]() #10 von
RudyB
, 24.01.2019 16:36
#10 von
RudyB
, 24.01.2019 16:36
Our way of modifying the day / night cycle time seemed quite handy, but we do need to modify the code and upload it again every time we like to change the cycle time. Is there maybe an easier way?
Yes there is ... we can change the cycle time 'on the fly' via a User Interface. There are different solutions, with hardware otr with software. We're going to try them both. In this video we'll do the first preparations, writing text and numbers to the PC screen via Serial.print().
Link to Fun with Arduino 08 User Interface Serial.print()
Youtube channel on Model Railway, Traincontroller, Arduino and more
RE: Fun with Arduino - a Series of Introductory Videos
![]() #11 von
RudyB
, 27.01.2019 10:50
#11 von
RudyB
, 27.01.2019 10:50
Before we continue to work on our User Interface, let's first take a moment to have a closer look at variables and data types. We are going to use ever more variables in the coming videos ... and ... we'll have a look at a pitfall concerning data types that prevented our code from previous video 8 to always work as intended.
Fun with Arduino 09 Variables byte int long unsigned
Youtube channel on Model Railway, Traincontroller, Arduino and more
RE: Fun with Arduino - a Series of Introductory Videos
![]() #12 von
RudyB
, 31.01.2019 15:11
#12 von
RudyB
, 31.01.2019 15:11
Now that we have our code working, by using the correct data type or by typecasting, we can continue the work on our User interface. The goal in this video is to display the status of our day / night cycle on screen ... is it switched on or off, is it day or night, and what is the currently used day / night time. All this will be dynamically updated.
Fun with Arduino 10 Show Cycle Status and Time with Serial.print
Youtube channel on Model Railway, Traincontroller, Arduino and more
RE: Fun with Arduino - a Series of Introductory Videos
![]() #13 von
RudyB
, 03.02.2019 09:41
#13 von
RudyB
, 03.02.2019 09:41
The User Interface works, it shows the status if the day / night cycle on screen. We're now going to add the option to change the cycle time via the keyboard. The functions we are going to use are Serial.available(), which tells us that there is new input, and Serial.read() or Serial.parseInt() to read the characters that are typed.
Fun with Arduino 11 Keyboard Input via Serial Read and ParseInt
Youtube channel on Model Railway, Traincontroller, Arduino and more
RE: Fun with Arduino - a Series of Introductory Videos
![]() #14 von
RudyB
, 07.02.2019 11:37
#14 von
RudyB
, 07.02.2019 11:37
Now that we can change the cycle time via the PC keyboard, let's have a look at a hardware oriented solution ... a rotating knob. We connect a potentiometer to an analog input and read the voltage with the analogRead() instruction. With the map() instruction we can convert the range from 0-1023 to the range that we like to use for our cycle time, like say 1-9 minutes with a 1 minute step size, or maybe 10-300 seconds, with a 10 second step size.
Fun with Arduino 12 Analog Input, analogRead(), Change Range, map()
Youtube channel on Model Railway, Traincontroller, Arduino and more
RE: Fun with Arduino - a Series of Introductory Videos
![]() #15 von
RudyB
, 10.02.2019 10:33
#15 von
RudyB
, 10.02.2019 10:33
The delay() statement that we used so far for our timing stalls the Arduino. This leads to a complete lack of feedback when we change the cycle time while the cycle is running. Luckily there is a solution: we can use the Arduino internal clock, which counts milliseconds from the moment the Arduino is started. We can read the clock using the millis() statement and we can decide if it is time for action.
Fun with Arduino 13 Timer with millis(), no delay(), Multitasking
Youtube channel on Model Railway, Traincontroller, Arduino and more
RE: Fun with Arduino - a Series of Introductory Videos
![]() #16 von
RudyB
, 14.02.2019 10:46
#16 von
RudyB
, 14.02.2019 10:46
Now that we know how to get rid of the delay(0 and use millis() in stead (video 13) we can finalize our Automatic Day Night Light Cycle unit to have direct on screen feedback of cycle time adjustment by the user and to have the cycle stop, and the lights turn off, immediately when the switch is set to ‘off’.
Our unit has quite nice specifications:
- Configurable timing, via keyboard or via analog input with on screen display
- An option to randomize the times to give it some ‘livelyness’
- On screen display of the on/off, day/night state and the cycles times
Fun with Arduino 14 Day Night Cycle with millis(), no Delay, Direct Feedback
Youtube channel on Model Railway, Traincontroller, Arduino and more
RE: Fun with Arduino - a Series of Introductory Videos
![]() #17 von
RudyB
, 17.02.2019 10:53
#17 von
RudyB
, 17.02.2019 10:53
We used analogRead() to read the voltage on our potentiometer. The Arduino also has the opposite instruction: analogWrite(). This name is somewhat misleading. Unlike with an analog input, where a 10 bit A/D converter is used, the Arduino does not have a D/A converter on board.
The analogWrite() function uses a technique called Pulse Width Modulation. A digital output switches between HIGH and LOW in a fast pace, whereby the HIGH percentage is proportional to the analog value we wish to send out. If a device that receives the signal is too slow to follow the switching frequency, the result is it 'sees' the average of the on/off times. This also holds for light ... even though LEDs are fast enough to follow the switch frequency, our human eyes + brain are not and we see an average brightness.
Fun with Arduino 15 LED Dimmer, analogWrite(), Pulse Width Modulation
Youtube channel on Model Railway, Traincontroller, Arduino and more
RE: Fun with Arduino - a Series of Introductory Videos
![]() #18 von
RudyB
, 21.02.2019 12:07
#18 von
RudyB
, 21.02.2019 12:07
Now that we know how to dim LEDs with analoWrite(), we can go a step further and change the dimming over time to create a gradual fade in or out. This is a nice effect for instance for LED strips mounted under kitchen cabinets, or for LED strip overhead lighting on a model railway layout to simulate a gradual change from night to day. And also for the red/green transition of railway signals along the track a fade gives just that little extra eye candy.
Fun with Arduino 16 LED Dimming with Fade, analogWrite(), millis()
Youtube channel on Model Railway, Traincontroller, Arduino and more
RE: Fun with Arduino - a Series of Introductory Videos
![]() #19 von
RudyB
, 25.02.2019 10:39
#19 von
RudyB
, 25.02.2019 10:39
We're at the start of a new Arduino project: an automatic railway crossing.
The system comprises several parts: train detection (optical), blinking lights ('blink' with a twist), a moving beam (servo motor).
We'll look into a way of specifying these kinds of systems as well as a way to translate the specifications into code, with a stepwise approach that does not put too much strain on our grey cells.
Fun with Arduino 17 Railway Crossing, State Transition Diagram, switch()
Youtube channel on Model Railway, Traincontroller, Arduino and more
RE: Fun with Arduino - a Series of Introductory Videos
![]() #20 von
RudyB
, 28.02.2019 10:51
#20 von
RudyB
, 28.02.2019 10:51
In part 2 of the railway crossing project we are going to connect the servo motor that operates the gate and control it with the Arduino. With the example in the video, the gate beam is mounted directly on the servo. On a layout, the servo motor will probably be mounted under the board, and a metal rod pulls / pushes the beam up and down, through a hole. No matter how it is mounted ... we need to find the correct servo angles. We will write some code with which we can fine tune the servo to find the angles to be used in the code later on.
Fun with Arduino 18 Railway Crossing, Servo Motor to Operate the Gate
Youtube channel on Model Railway, Traincontroller, Arduino and more
RE: Fun with Arduino - a Series of Introductory Videos
![]() #21 von
RudyB
, 07.03.2019 11:32
#21 von
RudyB
, 07.03.2019 11:32
There are several ways to do train detection, like sensing rail current, or a magnet under the train that triggers reed switches along the track, or with an optical sensor. The latter is used in this video, only because I had some TRCT5000's lying around and they were easy to setup for a demo. As soon as we have them working, we have some fun with them by making a train speed measurement device.
Fun with Arduino 19 Railway Crossing Train Detection with Optical Sensor
Youtube channel on Model Railway, Traincontroller, Arduino and more
RE: Fun with Arduino - a Series of Introductory Videos
![]() #22 von
RudyB
, 10.03.2019 12:14
#22 von
RudyB
, 10.03.2019 12:14
We have seen the separate ingredients for a level crossing in the previous three videos: blinking LEDs, servo to operate the gate, sensors to detect the train ... it is time to put it all together now into one piece of software. We'll use the State Transition Diagram as our starting point and build up the software in 5 easy to follow steps.
Fun with Arduino 20 Railway Crossing Putting it all Together
Railway Crossing UK version
Youtube channel on Model Railway, Traincontroller, Arduino and more
RE: Fun with Arduino - a Series of Introductory Videos
![]() #23 von
Max666
, 14.03.2019 09:56
#23 von
Max666
, 14.03.2019 09:56
Hello Rudy,
Video Tutorials are great and help a lot of people. I use Arduino in lot of my Projects too in similar way. I must study all that on my own so it's great that someone shares the knowledges!
Have a great fun by modeling!
LG,
Max Supercars
Max Supercars - www.youtube.com/MaxSupercars
- Max666
- InterRegio (IR)
-
Beiträge: 125 Registriert am: 28.12.2017

RE: Fun with Arduino - a Series of Introductory Videos
![]() #24 von
RudyB
, 14.03.2019 15:21
#24 von
RudyB
, 14.03.2019 15:21
A police car, fire fighter car or an ambulance with flashing lights can liven up any model railway laout. The challenge that we set ourselves is not to have to write different code any time we want another flashing pattern. We want to hav one and the same code and we only want to configure the number of stepd, number of LEDs and the flashing step sequence. Can we manage that? Yes of course we can ...
Fun with Arduino 22 Step Sequencer for LEDs
Youtube channel on Model Railway, Traincontroller, Arduino and more
RE: Fun with Arduino - a Series of Introductory Videos
![]() #25 von
RudyB
, 21.03.2019 15:10
#25 von
RudyB
, 21.03.2019 15:10
Neopixels, or addressable LEDs, are color LEDs with a built in chip that takes care of the one wire data communication and of the Pulse Width Modulation for the built in RGB(+W) LEDs. The LEDs are connected via just 3 wires, GND, 5V, Data. The Data line is connected to an Arduino output and we can control the color and brightness of multiple LEDs, via just one output. Wonderful to use in say a village with multiple houses on our model railway layout. The wiring is super simple and the lights in every house switch independently and can each have their own color an brightnes ... just like real.
Link to Fun with Arduino 23 Neopixel Addressable LED, WS2812, struct{...}
Youtube channel on Model Railway, Traincontroller, Arduino and more
-
- Ähnliche Themen
- Antworten
- Zugriffe
- Letzter Beitrag
-
- SCARM videos
Erstellt im Forum Software und Hardware von RudyB - 16
- 1597
- Letzter Beitrag von
RudyB

30.05.2022
- SCARM videos
-
- ARDIMO-wise: Arduino MM(2) protocol K83/84 decoder FREE TO DOWNLOAD!!
Erstellt im Forum Software und Hardware von - 14
- 3252
- Letzter Beitrag von
buzz4stroke
22.04.2021
- ARDIMO-wise: Arduino MM(2) protocol K83/84 decoder FREE TO DOWNLOAD!!
-
- A loco speed measurement device for € 6,- (Arduino based)
Erstellt im Forum Software und Hardware von - 1
- 1280
- Letzter Beitrag von
RudyB
29.03.2018
- A loco speed measurement device for € 6,- (Arduino based)
-
- DCC Sniffer – Packet Analyser with Arduino
Erstellt im Forum Digital von - 2
- 2055
- Letzter Beitrag von
RudyB
26.10.2015
- DCC Sniffer – Packet Analyser with Arduino
-
- Video's on working with Traincontroller
Erstellt im Forum Software und Hardware von - 62
- 27800
- Letzter Beitrag von
RudyB
24.04.2018
- Video's on working with Traincontroller
-
- Arduino DCC Function Servo Sound Decoder
Erstellt im Forum Digital von - 4
- 4538
- Letzter Beitrag von
RudyB
05.04.2015
- Arduino DCC Function Servo Sound Decoder
-
- Arduino's in series as an S88 occupancy detector interface:
Erstellt im Forum Digital von - 1
- 741
- Letzter Beitrag von
RudyB
01.12.2014
- Arduino's in series as an S88 occupancy detector interface:
-
- LUKOVA STRAN -MY LAYOUT 2014 VIDEO AND PHOTO
Erstellt im Forum Spur H0 von - 2
- 910
- Letzter Beitrag von
Pabel
26.11.2014
- LUKOVA STRAN -MY LAYOUT 2014 VIDEO AND PHOTO
-
- Detection with a reed switch and a magnet. Experiences?
Erstellt im Forum Digital von - 19
- 5396
- Letzter Beitrag von
shaddowcanyon
15.10.2014
- Detection with a reed switch and a magnet. Experiences?
